En esta entrada se realizara la instalación y configuración de un analizador de vulnerabilidades, OpenVAS, el cual esta desarrollado con base a un fork de la version libre de Nessus; en vista de que ahora Nessus maneja una licencia propietaria, esta ya no recibe aportes de terceros en su desarrollo.
Lo primero que se tiene que hacer es instalarlo, para eso se utilizara el siguiente comando, en BackTrack ya viene por defecto instalado:
1 | sudo aptitude install openvas-server openvas-client |
Una vez terminado de instalar, lo que se hará es crear un usuario con el cual se hace login al
servidor, para eso se hace lo siguiente:
01 | root@bt:~$ sudo openvas-adduser |
02 | [sudo] password for root: |
03 | Using /var/tmp as a temporary file holder. |
05 | Add a new openvasd user |
06 | --------------------------------- |
09 | Authentication (pass/cert) [pass] : |
11 | Login password (again) : |
15 | openvasd has a rules system which allows you to restrict the hosts that nachxs has the right to test. |
16 | For instance, you may want him to be able to scan his own host only. |
18 | Please see the openvas-adduser(8) man page for the rules syntax. |
20 | Enter the rules for this user, and hit ctrl-D once you are done: |
21 | (the user can have an empty rules set) |
28 | Is that ok? (y/n) [y] y |
Ahora lo que se hará sera crear un
certificado, debido a que sera necesario si nos conectamos remotamente,
para esto se hace lo siguiente:
01 | root@bt:~$ sudo openvas-mkcert |
02 | [sudo] password for root: |
04 | ------------------------------------------------------------------------------- |
05 | Creation of the OpenVAS SSL Certificate |
06 | ------------------------------------------------------------------------------- |
08 | This script will now ask you the relevant information to create the SSL certificate of OpenVAS. |
09 | Note that this information will *NOT* be sent to anybody (everything stays local), but anyone with the ability to connect to your OpenVAS daemon will be able to retrieve this information. |
11 | CA certificate life time in days [1460]: |
12 | Server certificate life time in days [365]: |
13 | Your country (two letter code) [FR]: PE |
14 | Your state or province name [none]: La Libertad |
15 | Your location (e.g. town) [Paris]: T3zL4 |
16 | Your organization [OpenVAS Users United]: Home |
18 | ------------------------------------------------------------------------------- |
19 | Creation of the OpenVAS SSL Certificate |
20 | ------------------------------------------------------------------------------- |
22 | Congratulations. Your server certificate was properly created. |
24 | /etc/openvas/openvasd.conf updated |
25 | The following files were created: |
27 | . Certification authority: |
28 | Certificate = /var/lib/openvas/CA/cacert.pem |
29 | Private key = /var/lib/openvas/private/CA/cakey.pem |
32 | Certificate = /var/lib/openvas/CA/servercert.pem |
33 | Private key = /var/lib/openvas/private/CA/serverkey.pem |
Una vez creado el certificado ahora solo quedaría iniciar el servicio, con el siguiente comando:
1 | root@bt:~$ sudo /etc/init.d/openvas-server start |
Luego se verifica si el servicio esta iniciado, y se verifica que el puerto 9390 este en escucha:
1 | root@bt:~$ sudo netstat -ltnp |
2 | Conexiones activas de Internet (solo servidores) |
3 | Protocolo Recv-Q Send-Q Dirección Local Dirección Externa Estado PID/Program name |
4 | tcp 0 0 0.0.0.0:9390 0.0.0.0:* ESCUCHAR 3014/openvasd: wait |
5 | tcp 0 0 127.0.0.1:43408 0.0.0.0:* ESCUCHAR 1766/beam.smp |
6 | tcp 0 0 127.0.0.1:7634 0.0.0.0:* ESCUCHAR 1233/hddtemp |
Como se puede observar que el servicio esta
iniciado a la espera de una conexión, para esto solo quedaría
ingresar a la interfaz cliente y poder empezar a trabajar, aquí les dejo
unas imágenes de muestra.
Imagen 01: Conexión al Servicio
Imagen 02: Creando un nuevo sondeo mediante el asistente
Imagen 03: Reporte final luego del sondeo
Y con eso tendría el servicio arriba y estará instalada y configurada la nueva herramienta para realizar análisis de vulnerabilidades. Espero sea de utilidad en alguna oportunidad.


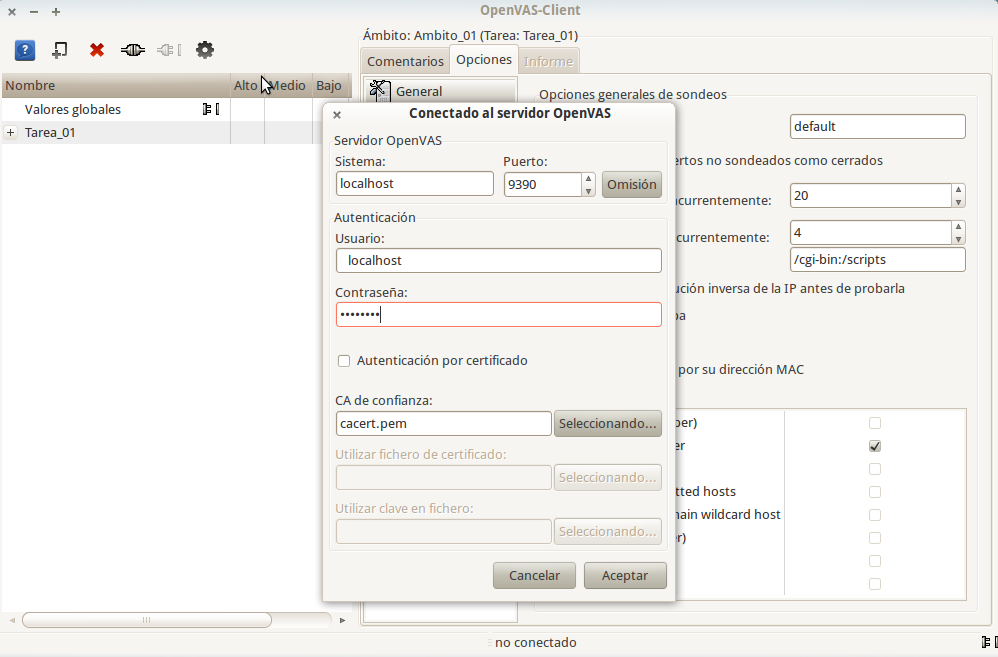
 Imagen 02: Creando un nuevo sondeo mediante el asistente
